


As a load cell supplier, I understand that proper installation is crucial to ensure the accurate and reliable performance of load cells. In this blog post, I will guide you through the process of installing a load cell, covering everything from preparation to the final testing.
Understanding Load Cells
Before we dive into the installation process, let's briefly understand what load cells are and their types. Load cells are transducers that convert force or weight into an electrical signal. They are widely used in various industries, including manufacturing, agriculture, and transportation, for weighing and force measurement applications.
There are several types of load cells available, each designed for specific applications. Some common types include:
- Bellow Beam Load Cell: Ideal for applications requiring high accuracy and low profile. Bellow Beam Load Cell
- Single-Ended Beam Load Cell: Suitable for applications where space is limited and a single point of load is applied. Single-Ended Beam Load Cell
- S-Beam Load Cell: Commonly used in tension and compression applications, such as hoists and cranes. S-Beam Load Cell
Pre-Installation Preparation
Selecting the Right Load Cell
The first step in the installation process is to select the right load cell for your application. Consider factors such as the maximum load capacity, accuracy requirements, environmental conditions, and mounting options. It is also important to choose a load cell from a reputable supplier to ensure its quality and reliability.
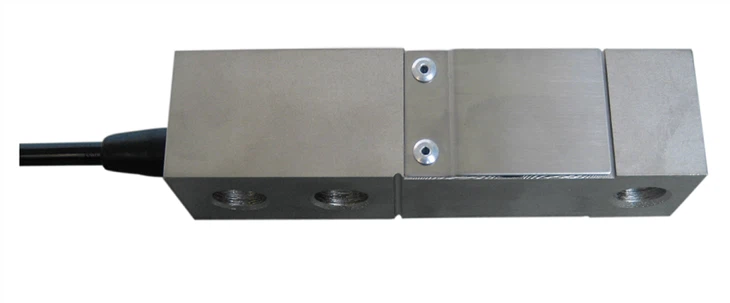

Gathering the Necessary Tools and Materials
Before you start the installation, gather all the necessary tools and materials. This may include a torque wrench, screwdriver, wrenches, mounting hardware, and a multimeter for testing. Make sure you have the correct size and type of tools for the load cell and mounting equipment.
Preparing the Installation Site
The installation site should be clean, flat, and free from any debris or contaminants. If the load cell is to be installed outdoors, ensure that it is protected from the elements, such as rain, snow, and extreme temperatures. You may need to use a protective enclosure or housing to shield the load cell from environmental factors.
Installation Process
Mounting the Load Cell
The first step in the installation process is to mount the load cell to the structure or equipment. Follow these steps:
- Position the Load Cell: Place the load cell in the desired location, ensuring that it is aligned correctly with the load path. Use a level or straightedge to ensure that the load cell is level and properly positioned.
- Secure the Load Cell: Use the appropriate mounting hardware, such as bolts or screws, to secure the load cell to the structure. Tighten the bolts or screws to the recommended torque specification using a torque wrench. Over-tightening or under-tightening the bolts can affect the performance of the load cell.
- Check the Mounting: After mounting the load cell, check to ensure that it is securely fastened and does not move or vibrate. Any movement or vibration can cause inaccurate readings and affect the performance of the load cell.
Wiring the Load Cell
Once the load cell is mounted, the next step is to wire it to the measuring device or controller. Follow these steps:
- Identify the Wires: Most load cells have four or six wires, each with a specific function. Refer to the load cell's datasheet or wiring diagram to identify the wires and their corresponding functions.
- Connect the Wires: Connect the load cell wires to the measuring device or controller according to the wiring diagram. Use appropriate connectors or terminals to ensure a secure and reliable connection.
- Insulate the Wires: After connecting the wires, insulate them to prevent short circuits and interference. Use electrical tape or heat shrink tubing to cover the exposed wires.
Calibrating the Load Cell
After wiring the load cell, it is important to calibrate it to ensure accurate and reliable measurements. Calibration involves adjusting the load cell's output signal to match the known load values. Follow these steps:
- Zero the Load Cell: Apply no load to the load cell and adjust the measuring device or controller to zero the output signal. This ensures that the load cell reads zero when there is no load applied.
- Apply Known Loads: Apply a series of known loads to the load cell, starting from the minimum load capacity and increasing in increments up to the maximum load capacity. Record the output signal for each load value.
- Calculate the Calibration Factor: Use the recorded output signals and known load values to calculate the calibration factor for the load cell. The calibration factor is used to convert the output signal into the actual load value.
- Adjust the Measuring Device: Use the calibration factor to adjust the measuring device or controller to display the actual load values accurately.
Post-Installation Testing
Testing the Load Cell
After installing and calibrating the load cell, it is important to test it to ensure that it is functioning properly. Follow these steps:
- Apply a Known Load: Apply a known load to the load cell and check the measuring device or controller to ensure that it displays the correct load value. If the reading is inaccurate, recheck the wiring, calibration, and mounting of the load cell.
- Check for Linearity: Apply a series of increasing loads to the load cell and check the measuring device or controller to ensure that the output signal increases linearly with the applied load. Any non-linearity in the output signal may indicate a problem with the load cell or the measuring device.
- Check for Hysteresis: Apply a load to the load cell, then remove the load and check the measuring device or controller to ensure that the output signal returns to zero. Any hysteresis, or difference in the output signal when the load is applied and removed, may indicate a problem with the load cell or the measuring device.
Monitoring the Load Cell
After testing the load cell, it is important to monitor its performance regularly to ensure that it continues to function properly. Monitor the load cell's output signal and compare it to the expected values. Any significant changes in the output signal may indicate a problem with the load cell or the measuring device.
Conclusion
Installing a load cell requires careful planning, preparation, and attention to detail. By following the steps outlined in this blog post, you can ensure that your load cell is installed correctly and calibrated accurately, providing reliable and accurate measurements for your application.
If you have any questions or need further assistance with load cell installation or calibration, please feel free to contact us. We are a leading load cell supplier, and our team of experts is available to help you with all your load cell needs. Whether you are looking for a specific type of load cell or need advice on installation and calibration, we can provide you with the solutions you need. Contact us today to discuss your requirements and explore how we can assist you in your weighing and force measurement applications.
References
- Load Cell Handbook, [Publisher Name], [Year]
- Industrial Weighing Systems: Theory and Practice, [Author Name], [Year]

